Thursday, January 21, 2016

Weaving


Please note this project may take 2-3 days to complete depending on the size of the weave you are trying to create.

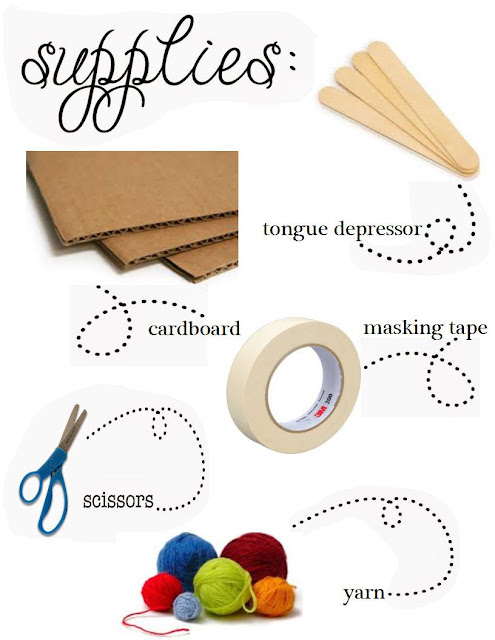
To start this project you will need a square piece of cardboard with notches about a half inch deep along the top and bottom for as many pieces of yarn that you plan to use.  For the initial yarn you need to loop it around the slits top to bottom.  Then choose a different color of yarn to start weaving with.  Cut a long length of yarn and attach one end to the end of a tongue depressor with masking tape.  Tie the other end to the first string along the bottom.

Using the tongue depressor, weave the yarn in and out and pull tight pushing the line of yarn all the way to the bottom. Continue this step until you are ready to change colors.


You will need to tie off the yarn to the last string when done with it.  To change colors, prepare another tongue depressor with your new color of yarn and tie to the first string again. Begin weaving the new yarn through as you did in the first step.


Continue weaving the yarn in and out with the colors that you want to create any pattern that you want until you reach the end.


The finished product stays on the cardboard


Snake


Please note before starting this project that it will take at least 2 to 3 days to complete.

Each child will need to have at least 4 toilet paper rolls to start.  The children can put one hand inside the toilet paper roll in order to hold it and paint the entire outside of the roll.  They will need to paint each of their rolls and then let them dry completely.


Once the rolls are dry, each end of the tube will need to be cut to a triangular shape. Once the rolls are cut, use the hole puncher to punch one hole in the middle of the top and bottom of the end of the rolls. Remember the rolls that are the head and tail only need to have one end hole punched.  Begin assembling the snake by putting the rolls inside each other so the punched holes line up.  Put a brad in each hole.  Cut a long, forked tongue for the snake out of red paper and glue it under the top part of the roll of the head.


The children can then paint whatever design they want on their snake.


Glue the eyes on the head of the snake.


The snakes are now ready for the hunt!


Bat Skeleton


To start this project you will need to have an outline of a bat drawn on a white piece of paper to show the bones of the bat.

Have the children use colored pencils to color the wings and parts of the body of the bat that are around the bones.


Next, put glue on each bone of the bat.


Place tooth picks on the bones of the bat.


Bat


Please note this project may take 2 days to complete depending on how long it takes for the paint to dry.

To start this project you will need to have a bat body and wings drawn on brown paper and bat legs cut out of black paper.
Paint the paper plate yellow.


While the plate dries, cut out the wings and body of the bat.


Glue the legs of the bat onto the bottom of his body.  Now put glue on the body and on the top of the legs to put pieces of tissue paper on the glue.  The tissue paper will be the bat's fur. (Note: if you have dryer lint this would be perfect to use in place of tissue paper for the fur)


Once your bat's fur is done, glue the bat's wings on the paper plate.


Put glue on the back of your bat's body and glue it onto the paper plate where the bat wings meet.


Put the eye stickers on your bat's face and now you have a bat flying in front of the moon.


Bat Anatomy


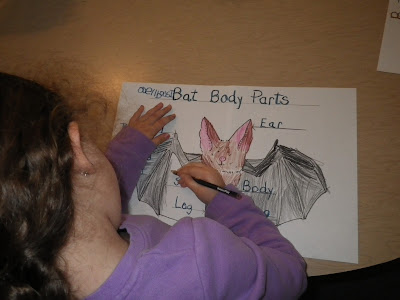
In order to start this project you will need to have the body of a bat printed on a piece of paper with lines to label each body part.

Using colored pencils have each child trace all of the words labeling the parts of the bat's body and then color the bat.


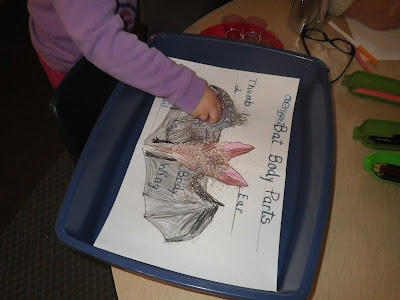
Put glue all the way down each finger of the bat.


Put the paper in a bin and dump the glitter over the glue on the bat's wings.


Pick up the paper with two hands and bend the sides up slightly to get the loose glitter to the center of the paper.


Dump the excess, loose glitter into the bin.


The finished bat


Wednesday, January 20, 2016

Shark Chart


Please note that this project may take 3 or more days to complete.

The object of this activity is to have sharks that are all different sizes in order to show the variety of sharks in the ocean and to practice measuring.

For this project you will need to have 3 different sharks drawn/printed on white paper.  The children will start out by coloring the 3 sharks with crayons.


Next, the children will need to cut out each shark


Glue each shark on a large sheet of colored paper.  The colored paper needs to be large enough to add more information about each shark.


Have the children use a ruler to measure each shark to determine its length.  We had a scale of 1 inch - 1 foot.  With a sheet of colored paper that contrasts the color the sharks are glued on, have the children create a number line for each shark to represent how long each shark is and then on lined paper have the children write out each shark's name and how long they are with colored markers.  For example, "A tiger shark was 18 feet long." Finally, tape all three sections along the back together, one right on top of the other.


Monday, January 18, 2016

Shark Scales


In our study of sharks we learned that sharks do not have scales but sharp teeth like skin called denticles.  To help the children to understand this, we used egg shells to demonstrate the texture of the shark's skin.

Children should first crush a handful of egg shells in a ziploc bag by using a rock or a roling pin (the egg shells will be SHARP so no hands!).  You will then need to draw a shark on colored paper.

The children should then glue the eye on the shark.

The children should spread lots of glue on the body of their shark and then place the egg shells on the glue.


The finished project!!