Wednesday, September 24, 2014

Stripe Sharks

For this project you will need a shark shape cut out from a sheet of construction paper. Have the children use a contrasting color of construction paper to cut out strips for the stripes of their tiger shark.


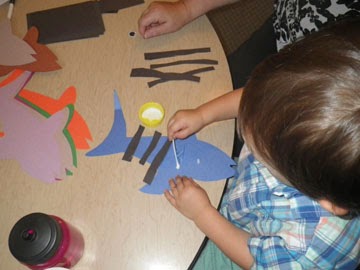
 When the strips have been cut, they are glued onto the shark shape.


When all the stripes are on the shark, use the scissors to carefully trim them.
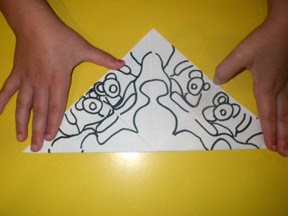
 Color the ocean on a piece of white paper...


 And glue the shark in the water!


Wednesday, July 30, 2014

Symmetry - Reflective


Reflective symmetry is when one half of an object is a mirror image of the opposite half. The line of symmetry can be vertical, horizontal or at any angle in between!

For this project we used white watercolor paper, water based markers, water and a paint brush.

We folded the paper in half, open the fold and refold in the opposite direction (this makes the ending step a little easier). Place the paper fold side toward the children. Using the watercolor markers have the children draw a picture or design.


Then unfold the paper with the drawing facing up and using the paint brush, paint the water on the blank bottom half of the paper.


Then fold the top half of the paper with the drawing down over the wet half and press/rub together. Carefully open the paper to reveal the reflective pattern!


Symmetry - Rotational


Rotational symmetry is when an object can be rotation on a central point and look the same. For this project we cut a sheet of white paper into a square and folded it corner to corner 3 times (like you would fold to cut out a paper snow flake). On the top triangle the children can draw their starting pattern. We drew our names or simple designs.

Then, unfold one fold and use a window or light board (we used our glass front refrigerator!) and trace your design on the blank triangle. Repeat this - unfold and flip/turn the paper as needed - to trace the design on all 8 creased triangle areas.


 Then open all the folds to reveal the rotational symmetrical design!


For some added fun, we decided to add color to our designs. Remember it has to be symmetrical so the colors should match in each triangle section too!


Wednesday, July 23, 2014

Symmetry with Random Objects

These are the supplies we used, but any variety of items will work for this project. Try to include a variety of texture and color to encourage creativity.
We discussed symmetry in nature. We took a walk through the yard and searched for different objects with symmetry. The children brought in pine cones with rotational symmetry. Flowers have rotational and reflective symmetry.

We began our study by making a center line - a line of symmetry. Then with our partners we worked in pairs; one partner made a pattern on one side of the stick and the other partner mimicked the pattern on the other side of the stick to create the symmetrical design.


Wednesday, July 16, 2014

Free Lesson plan

Smart Squirrel will be selling lesson plans for children 3-6 years of age.  Lesson plans include, songs, pictures, book list, games, and activities.

Get a free lesson plan for winter animals here:

Smart Squirrel Winter Animals Lesson Plan

Be sure to check back for future lesson plans.

Sun catchers

  A little stinky but fun to make.  We used plastic pony beads and glass bobbles.  Children arranged them in a foil pie dish and metal cookie cutters and cupcake tins.  Then we baked it 400 degrees for 15-20 min.  placed them in the refrigerator for 5 minutes to cool, they pop right out.  We used fishing line to sew them together.


Batik Art

  We drew a picture on a cloth lightly with a pencil.  Then we applied water based glue on the lines.  Let it dry for 24 hrs.  Then we painted on the material using watered down acrylic paint almost like water colors.  Let that dry 24 hrs.  Then put the entire cloth into warm water to remove the glue.  An interesting picture is left.


Painting a stain glass picture

With glass beads created a picture.  Then using clear glass paint applied to the glass.  To create a stain glass we added led lines.  Then painted the entire picture with glass paint.  They look great!  Children enjoyed this, they made several.


llllllllllll

Tie-Dyeing


A day of tie-dyeing & exploring colors!

The children first played with different types of materials and tested each for how the dyes covered and reacted with each other. We tested silk, cotton and flannel.

We decided that cotton works the best!


Nature Collage

The children gathered items from the yard. We sorted the different items collected by colors. The children then selected items from the different color groups to create their collage.