Thursday, March 17, 2016

Birds Spring Workbook

Go to


for a FREE activity to complete with your class/children in the spring to track the birds migrating back in the spring.

If you have any questions or suggestions of activities and lesson plans then please contact us at growing_minds_school@yahoo.com.


Reading Posters - Animals

Go to 


You can get a free set of Reading Posters for your children to help them practice their reading.

If you have any questions or suggestions for other activities or lessons please contact us at growing_minds_school@yahoo.com.

Monday, February 15, 2016

The Unique Arctic

Go to 


to purchase the Lesson Plan for the Arctic and the map activity shown below 


Monday, January 25, 2016

Pumpkin


Please note that this project may take 2-3 days to complete.

This activity will help to teach kids about the different parts of the pumpkin and would be great to complete around Halloween when they will be creating jack-o-lanterns at home.

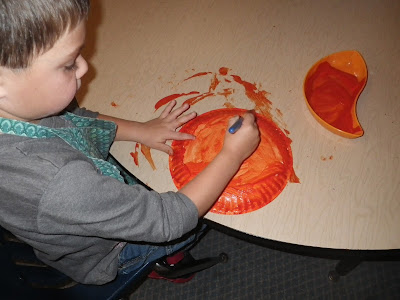
Paint the bottom of one paper plate and the inside of another paper plate and let them dry.


Glue the yarn and pumpkin seeds on the plate that has the inside painted. 


Cut the circle part of the plate out of the plate that has the bottom painted.  Now staple this plate to the plate with your seeds and yarn glued on.


Cut out the stem of the pumpkin from colored paper and glue onto the top of the pumpkin.


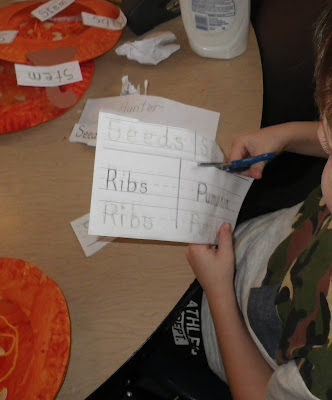
Have the kids use markers to write the different parts of the pumpkin on lined paper.


Have kids cut the words out in order to label their pumpkins.


Glue the words on the correct part of the pumpkin.


You now have a fully labeled pumpkin.


Sewing


To start this project have the designs that you want the children to sew cut out of the felt into the shapes needed and have squares of felt large enough to fit an embroidery hoop and for the shapes to fit.  The embroidery hoop is optional but some children may find it easier to sew with the fabric being held in the hoop.

We chose to start out sewing jack-o-lanterns.  Have the children sew the round pumpkin toward the bottom of their square.


Now you can have the children sew the stem onto their pumpkin.


Once the stem is sewn on, the children can then sew the star in one of the top corners.


To give your pumpkin a face, the children can then sew beads on the pumpkin to make the jack-o-lantern's face.


We also had the children sew ghosts and used buttons to to decorate it.


Bugs


Use liquid starch or you can make a glue mixture using two parts water to one part glue for the glue for this project.

This will help the children to understand that insects have 3 different body parts.

To start the children were given a white sheet of paper with the 3 body parts already drawn on.  They were then given 3 different shades of blue tissue paper. 

The children started out drawing the legs and antennae on the insects and then began gluing the tissue paper onto them.  The children were told to put one shade of paper per section.


Once the tissue paper is all on the children can then glue the eyes on their insects.


The finished product


Thursday, January 21, 2016

Family album book

 
Please note that this project may take 3 or more days to do.

To start this project you will need to have heads cut out white paper that the children can use to create their faces.

Have each child start out by looking in the mirror so they can draw their own face on the paper head.


Once the face is drawn and colored, then they can cut strips of colored paper for their hair.


Glue the strips of hair onto the head.  (To get curls, wrap the strips around a marker tightly to get the paper to curl)


Once their heads are complete, give the children a strip of lined paper to write "This is me, (inset their name)." with a colored marker.


Glue the head on a large sheet of colored paper and then glue the paper with the sentence at the bottom of the paper.


Once their head is complete you can give them more heads to make the rest of their family.  You can repeat the above steps for each head and change the sentence so it says who the head is. For example, "This is my dad."  After all members of the family has been made then they can all be stacked together to make a book.

Have them use a sheet of colored paper to create a cover for the book and a piece of lined paper to write the title of the book "My family" that they will then glue on the cover.  Once this is complete, staple the top left and bottom corners of the book.

Use a paper hole punch to punch holes spaced out so the children can "sew" the binding of the book between the staples.  To sew the book, cut some yarn and wrap masking tape around one end to use as the "needle".


Now they have a home made "picture" album of their entire family!


Weaving


Please note this project may take 2-3 days to complete depending on the size of the weave you are trying to create.

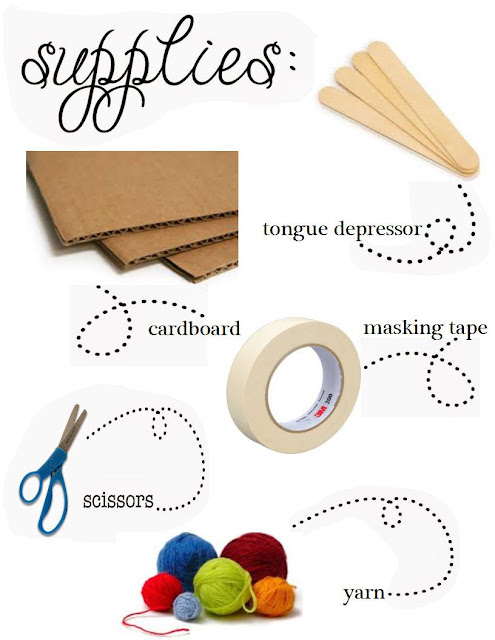
To start this project you will need a square piece of cardboard with notches about a half inch deep along the top and bottom for as many pieces of yarn that you plan to use.  For the initial yarn you need to loop it around the slits top to bottom.  Then choose a different color of yarn to start weaving with.  Cut a long length of yarn and attach one end to the end of a tongue depressor with masking tape.  Tie the other end to the first string along the bottom.

Using the tongue depressor, weave the yarn in and out and pull tight pushing the line of yarn all the way to the bottom. Continue this step until you are ready to change colors.


You will need to tie off the yarn to the last string when done with it.  To change colors, prepare another tongue depressor with your new color of yarn and tie to the first string again. Begin weaving the new yarn through as you did in the first step.


Continue weaving the yarn in and out with the colors that you want to create any pattern that you want until you reach the end.


The finished product stays on the cardboard